Wednesday, 26 February 2014

Vegan Hot Cross Buns


It's that time of year again, when the supermarkets are filled with the delicious scent of spiced, fruit filled hot cross buns. I know it's not Easter yet, but I wanted to try my hand at veganizing hot cross buns now as the baby is due on Easter Sunday, and I doubt I will be doing much baking around the time of the due date! 

I'm so happy with how these turned out, they are exactly like the butter, egg and milk laden hot cross buns from a bakery, but without any of that cruel, yucky stuff!

 Vegan Hot Cross Buns
Makes 12
Recipe adapted from Jamie Magazine, Issue 18

For the buns:
50g + 1tsp sugar
7g sachet dried yeast
150ml tepid water (from the tap)
450g plain flour
1tsp salt
2tsp mixed spice
125g sultanas
1 1/2tsp egg replacer + 2Tbsp water
50g vegan shortening, melted
50ml almond milk, warmed

For the crosses:
100g flour
50ml water

To finish:
2Tbsp sugar
1/4C orange juice
1 1/2tsp egg replacer + 4Tbsp water

Whisk together 1tsp sugar with the yeast and tepid water and set aside to froth up.
Sift the flour, salt & spices into a large mixing bowl , then add the sultanas and the remaining sugar and mix. 
Make a well in the center and pour in the yeast mixture, egg replacer mixture, warm milk and melted shortening. Mix using a wooden spoon until the dough comes together. 
Turn out onto a lightly floured surface and knead until the dough is soft and smooth, around 5 minutes (or mix in a stand mixer for around 3 minutes)
Form the dough into a ball and place back into the bowl. Cover with a plastic bag and leave to rise in a warm place for an hour or until doubled.

Knock the air out of the risen ball of dough and knead for a minute. Divide the dough into 12 even pieces (around 75g each, if you want to get technical!) and roll each piece into a smooth ball.
Place the buns onto a large, well oiled baking tray, leaving plenty of room for them to expand.
Cover with plastic bags or a damp tea towel and leave to rise again until doubled, around 45 minutes to an hour.

Once the buns have risen, preheat the oven to 220/GM7 and mix together the flour and water to make a smooth dough. 
Roll the dough into a sausage, about 1cm thick and divide into 12 pieces.
Cut each piece in half and roll into a thin sausage, about 8cm long. Brush each bun with the egg replacer mixture and lay the dough strips on top in the shape of a cross. Cut off any extra pieces of dough and press the crosses down slightly to secure them to the buns. Brush the crosses with more egg replacer mixture and bake for 15-17 minutes, until golden brown.

Heat the orange juice and sugar together in a pan until the sugar is dissolved and the syrup is bubbling. Brush the hot syrup over the buns and leave to cool.

Serve sliced in half, toasted and spread with your favorite dairy free buttery spread!

Enjoy xo


Sunday, 23 February 2014

Easiest Victoria Sponge Cake


When I think of afternoon tea, I think of Victoria Sponge Cake! For me it's the classic English cake, and I can't believe that I don't have a recipe on the blog for it!

I've tried quite a few vegan versions of this classic sponge cake, but this one is by far the easiest! Super soft, sweet sponge cakes sandwiched together with copious amounts of vanilla frosting and fruity jam, finished with a dusting of icing sugar. 

Sponge recipe adapted from here

Victoria Sponge Cake
Serves 8-12

For the sponge:
1 1/2C + 3Tbsp plain flour
1C caster sugar
1tsp baking soda
1/4tsp salt
1tsp white vinegar
2tsp vanilla extract
5Tbsp vegetable oil
1C water

For the frosting:
1Tbsp (heaped) dairy free butter
1/2tsp vanilla extract
2-3C icing sugar

To finish:
1/2C strawberry or raspberry jam
1Tbsp icing sugar

Preheat the oven to 350/GM3. Grease and line 2 small cake pans.

In a large mixing bowl mix your dry ingredients together. Add the wet ingredients in one go and whisk together until you have a smooth batter.
Pour into the cake pans and bake for 30 minutes, until a skewer inserted into the center of the cakes comes out clean. Turn out of the tins onto a cooling rack and leave to cool completely.

Make the frosting by creaming together the butter with the vanilla and icing sugar, adding more as you need it until you get a thick, light frosting. (If you need to, add a few teaspoons of dairy free milk)

Once the cakes are cooled, spread the frosting onto one of them and then the jam on top of the frosting. (Don't spread right to the edges of the cake or it will squidge out!) Place the second sponge on top and press down slightly. 

Finish by dusting with the icing sugar and serve with a nice cup of tea!

Enjoy xo

Friday, 21 February 2014

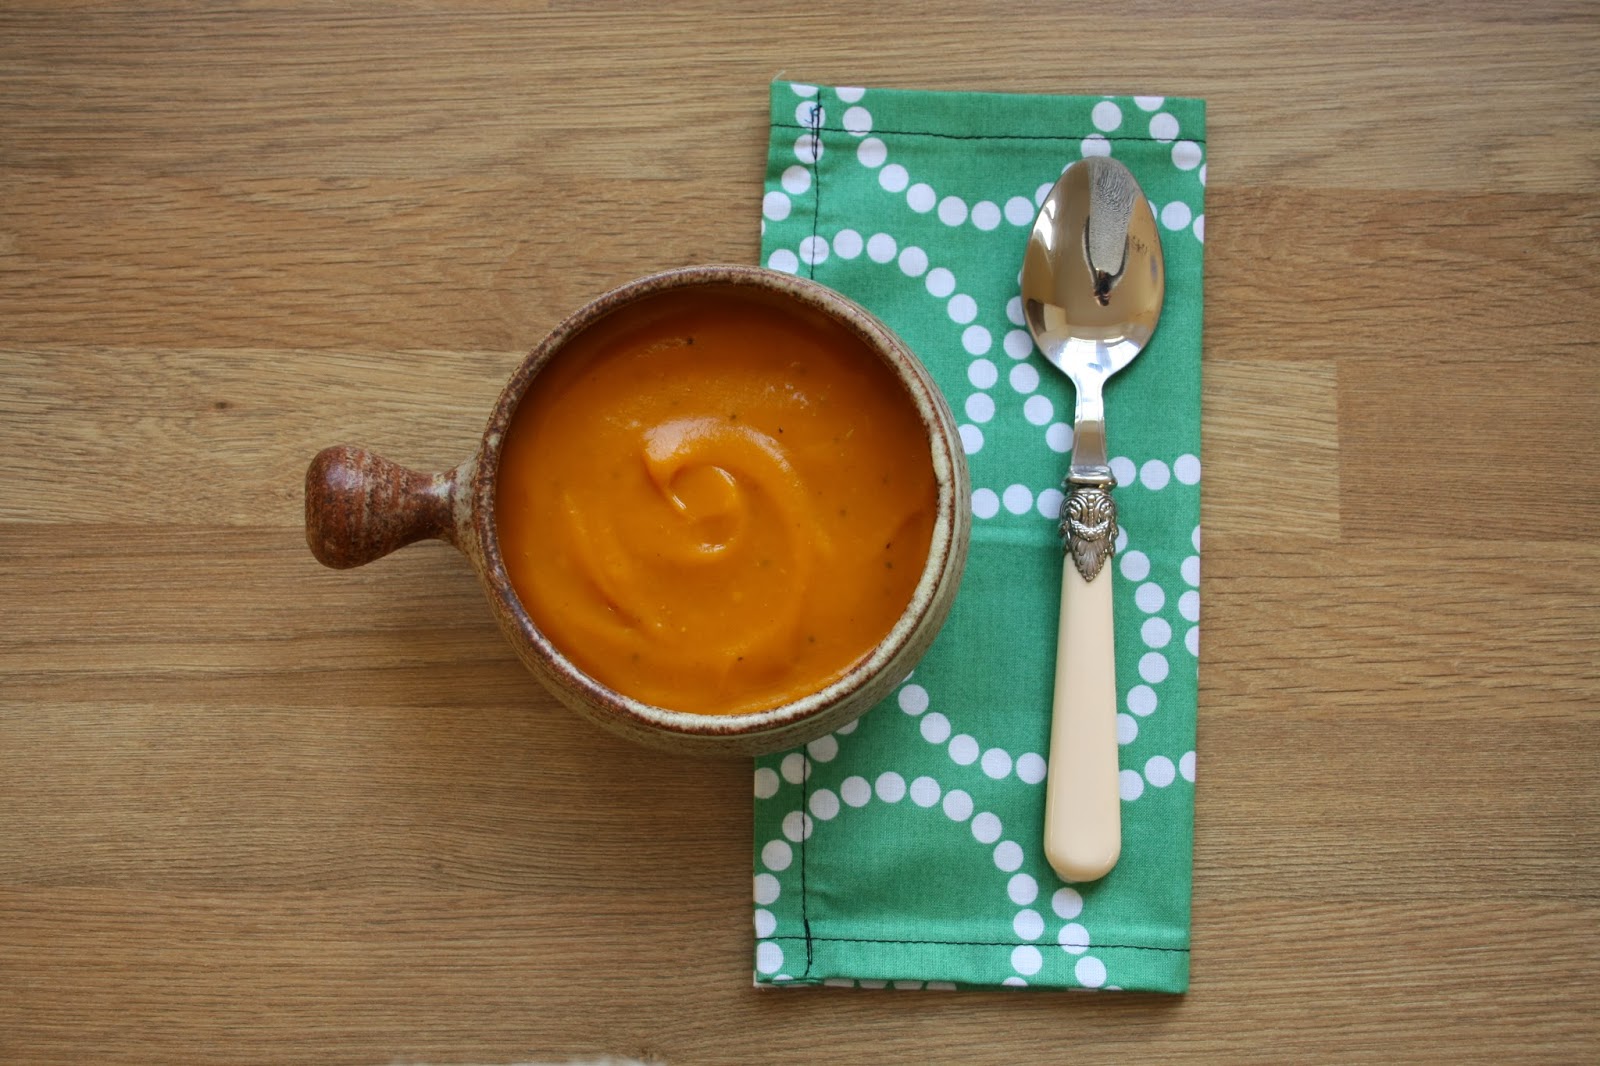
Butternut Squash Soup


Do you have a go-to meal that you make when you have guests over for lunch? For me it's this soup! Firstly because other than chopping the veg there's hardly any effort at all, and secondly because everyone always loves it! Win-win!

Butternut Squash Soup
Serves 8

1 large or 2 medium butternut squash*
1 onion
2 large carrots
2 medium baking potatoes
2 stalks of celery
1 heaped teaspoon medium curry powder
1 heaped teaspoon garam masala
1tsp smoked paprika
1Tbsp sugar
2 pints vegetable stock
Salt & Pepper to taste

Peel the squash, carrots and potatoes and chop all of the veg into medium sized chunks.
Heat a tablespoon of olive oil in a large wok or stock pot and add your spices. Stir to make a paste and add all of your chopped veg. Stir to coat the veg chunks in the spice infused oil and allow to fry for about 2 minutes. 
Pour in your vegetable stock and turn up the heat. Once the soup is bubbling turn the heat down to medium and place a lid on top of the pot. Simmer for 30-40 minutes, stirring regularly, until all the vegetables are softened. 
Remove from the heat and blend until smooth. Return the now smooth soup to the pan and stir in the tablespoon of sugar. Season to taste.

I love this soup served with some crusty bread and vegan butter!

*use the hugest squash you can find, the more squash you use the better the soup will be!
Note: this soup can be kept in the fridge for 3 days or in the freezer for 3 months.

Enjoy xo

Thursday, 20 February 2014

Everyday Tofu Scramble

 
Does anyone else wake up in the middle of the night thinking about breakfast? No? Just me?
 
Well, last night I woke up at 3am and couldn't get back to sleep no matter what I tried (this has become a common occurrence now that I'm in the third trimester) and while I was laying in bed, trying to get comfortable, all I could think about was the tofu scramble I was planning to make for breakfast. When my husband finally woke up at 7:45 I forced him out of bed so that we could eat as soon as possible!
 
This is my basic, go-to, everyday Tofu Scramble recipe. It's quick, easy and delicious!
(Every time I post a picture of this scramble on Instagram people ask me for my recipe, and I finally measured everything out properly and wrote everything down!)  
 
Everyday Tofu Scramble
Serves 2
 
1 block firm tofu
1Tbsp dairy free butter
1Tbsp braggs liquid aminos
1/2tsp garlic powder
1/2tsp onion powder
1/2tsp season-all
1/4tsp turmeric
1/2tsp vegetable bouillon powder
1/4C nutritional yeast flakes
Black pepper (to taste)
 
Put a medium sized frying pan over a high heat and let the butter melt. Drain the tofu as much as you can and place the block into the pan, whole. Break up into pieces using a wooden spoon or spatula and sauté for about 5 minutes, until most of the excess liquid from the tofu has evaporated and the tofu is starting to change colour slightly.
 
Add all your seasonings and sauté, stirring constantly until the tofu has all changed to a beautiful golden yellow. Continue to fry, stirring regularly, for a further 5-10 minutes, until the tofu has browned slightly, is dry and hot.
 
Serve with toast and a nice cup of tea for a super start to the day!
 
Enjoy xo


Wednesday, 19 February 2014

Crockpot 'Butter' Chickpeas & Vegan Naan Bread


With the baby *hopefully* arriving in about 6 weeks time, I've been on the look out for really simple recipes that will freeze well, as I'm planning to batch cook at least a months worth of meals to pop in the freezer for once the little lad has arrived. This meal is definitely going on my to-batch-cook-list!
 
Butter Chicken was my husband's favourite curry before going vegan, and Naan breads are one of the few things I've missed since going vegan (I was completely devastated when I discovered they are usually made with yogurt!) so needless to say this meal made us both oh so happy!
 
The Butter Chickpea recipe is so ridiculously simple even the most inexperienced cook could easily whip this up, and I thought that making my own Naans would be complicated, but trust me this recipe is simple and hassle free! I was able to make this on a day when I was feeling under the weather, so trust me when I say it isn't difficult!
 
Both recipes are adapted from here
 
Crockpot 'Butter' Chickpeas
Serves 4
 
2 tins cooked chickpeas
1/2 a large onion, finely chopped
3 cloves garlic, minced
1Tbsp grated ginger
2tsp curry powder
2tsp mild curry paste
2Tbsp garam masala
1/2tsp turmeric
1/2tsp salt
3oz tomato paste/purée
1 can coconut milk
1/2C plain soy yogurt
1/2C soy cream
2Tbsp dairy free butter
 
Lightly coat the bottom of your crockpot with a little oil. Spread the chopped onions over the bottom of the pot. Pour the chickpeas on top (don't stir, try to get them in an even layer covering the onions)
 
In a jug or small mixing bowl whisk together the coconut milk, yogurt and 1/4C of the cream. Add the spices and tomato paste and once combined pour evenly over the chickpeas and onions. Pop the tablespoons of butter on top of the sauce and put the lid on the pot. Cook on high for 4 hours or on low for 6-8 hours, stirring several times after the first hour of cooking.
 
Once ready to serve simply stir through the remaining 1/4C of cream and serve with some basmati rice and your homemade naans.
 
Note: if you don't have a crockpot you can cook this curry in a pot in the oven on a low heat for 3-4 hours. Curry can be frozen for up to 3 months.
 
Vegan Naan Breads
Makes 8 small naans
 
4C plain flour
1 1/2tsp baking powder
1tsp baking soda
1Tbsp sugar
1/4C hot water (from the tap)
3/4tsp dried active yeast
3/4C warm dairy free milk
1C plain soy yogurt
2Tbsp dairy free butter, melted
herbs & seasonings of your choice
 
In a measuring jug combine the hot water and sugar and stir until the sugar is dissolved. Add the yeast and mix well. Set aside for 10 minutes, until the yeast mixture goes frothy.
 
In a large mixing bowl combine the flour, baking powder and baking soda. Once the yeast mixture is foamy, whisk in the warm milk and yogurt with a fork. Pour into the middle of the dry ingredients and mix with a wooden spoon until the mixture just comes together.
 
Use your hands to finish mixing the dough, until a smooth but still sticky ball has formed. (This is a bit messy, but doesn't take long!) Cover the bowl with a plastic bag and leave in a warm place for an hour to rise.
 
Once the dough has risen and is nice and soft to the touch, remove from the bowl and knead for a couple of minutes on a lightly floured surface. Divide into eight equal portions and roll each portion into a ball. Place a cast iron/non-stick pan over a medium heat. Roll each ball of dough out into a rough oval shape, making sure they are at least 1/4 of an inch thick.
 
Once the pan is hot, brush the top sides of the naans with melted butter and sprinkle on any herbs you like (I sprinkled a little garlic powder onto each one) One at a time place the naans buttered side down into the pan and cover. Cook for 1 minute, until bubbles begin to form. Brush the other side with butter and flip over. Cook uncovered for a further 2 minutes and remove from the pan. Repeat until each naan is cooked and beautifully charred.
 
Serve warm with your 'Butter' Chickpeas and rice!
 
Note: Store leftovers in an airtight container for up to 3 days or in the freezer for up to 3 months.
 
Enjoy xo


Saturday, 8 February 2014

Sesame Balls filled with Red Bean Paste (Jin Deui)

 
One of my favourite Asian treats are these amazing fried Sesame Balls filled with deliciously sweet Red Bean Paste that you find in the little bakeries in China Town. I can't go anywhere near China Town without picking up one of these babies, but I never thought of making my own at home.
 
My mum recently bought me a packet of sweet red bean paste, and I've been thinking of ways to use it! I'm planning on making some steamed buns later on this weekend (Pete's absolute favourite thing ever) but this morning I discovered that I happened to have all the ingredients I needed to make my own Jin Deui, and they turned out so awesome!
 
I've been inspired by my overseas bestie Kate's to do a step-by-step for this recipe! (ps: if you haven't checked out her blog The Geeky Gal you totally should, its awesome.)
 
 
Sesame Balls filled with Red Bean Paste (Jin Deui)
Makes 12
Recipe adapted from here
 
1/3C sweet red bean paste
1/2C sesame seeds (untoasted)
1/3C brown sugar
1/3C boiling water
1/3C cold water
2C glutinous rice flour, plus extra for rolling
Vegetable oil for frying
 
 
Pour the boiling water over the brown sugar and stir until all the sugar is dissolved. Add the cold water and stir.
 
 
Dump the rice flour into a medium mixing bowl, make a well in the centre and pour in the brown sugar mixture. Mix well with a spoon until the mixture comes together and then knead with your hands for around five minutes until the dough is a smooth, soft ball.
 
 
Roll into a long sausage and cut into 12 even pieces.
 
 
Dust your hands with a little of the rice flour, roll a piece of the dough into a ball, flatten it out and spoon a teaspoon of red bean paste into the centre. Bring the edges of the dough together and pinch so that no red bean paste can escape.
 
 
Carefully roll into a smooth ball and then roll in the sesame seeds, making sure each ball is well coated.
 
 
Continue with the rest of the dough until they're all rolled, coated and ready to be fried!
 
 
Pour about 1 1/2 inches of oil into a small pan and place it over a low heat.
 
 
I found that if you have the patience to let the sesame balls cook on a low heat slowly, they turn out much better. Flip them over a few times to allow them to cook evenly. They're ready when they have puffed up and look nice and golden on the outside.
 
 
Remove the sesame balls from the oil using a slotted spoon or a pair of tongs and place on a plate lined with paper towel. Continue until all of the sesame balls are fried, golden and delicious.
 
These are best served warm, but can be eaten cold too!
 
Enjoy
Charis xo


Saturday, 1 February 2014

Decadent Dark Chocolate Orange Cake


I have a confession to make. Sometimes I actually like baking a cake more than I like eating it. I know, there must be something wrong with me, right!? There's just something so satisfying about creating something from scratch. I am always amazed that you can put something into the oven looking like a sloppy mess and when you take it out it's transformed into something completely different. So yes, I really love to bake, and even though I'm not eating sugar at the moment, I still love baking for the people I love.
 
This Decadent Dark Chocolate Orange Cake is so rich, oh so chocolatey but with a fruity zing which is just irresistible. And best of all, it's super simple to whip up!
 
Decadent Dark Chocolate Orange Cake
Serves 8-12
 
For the cake
1 1/2C plain flour
1/2C cocoa powder
1C sugar
1tsp baking soda
1tsp balsamic vinegar
1/3C oil
1/3C water
1tsp vanilla extract
1C freshly squeezed orange juice
Zest of 1 orange
1C dark chocolate chips
 
For the icing
1C icing sugar
Zest of 1 orange
Juice of 1/2 an orange
 
To decorate
Physalis
(sliced Kumquats would also be good!)
 
Preheat your oven to 175/GM4, grease a large cake tin and line the bottom with greaseproof paper.
In a large mixing bowl combine all the dry ingredients with a whisk. Make a well in the centre and add your wet ingredients and the orange zest. Whisk together until a thick but pourable batter forms. Fold in the chocolate chips and pour into the cake tin. Bake for an hour, until the cake no longer jiggles when shaken and a skewer inserted into the centre of the cake comes out mostly clean (because of the chocolate chips it wont come out completely clean.)
Set aside to cool completely in the tin, once cooled refrigerate for an hour or overnight top make sure that the chocolate is really set.
 
Remove your cake from the fridge and carefully take it out of the tin. Make the icing by combining all the ingredients and mixing thoroughly until you get a thick, spreadable mixture. Pour all the icing onto the middle of the cake and, using a spoon, spread the icing carefully to the edges of the cake, allowing some to drip down the sides (but not too much.)
 
Top with physalis, or whatever you fancy using to decorate it! I think chocolate curls would look beautiful, or thin slices of kumquat.
 
This cake is delicious as it is, but is also really fudgy and comforting when eaten warm (if you want to eat it warm, just pop your slice in the microwave for 20 seconds and enjoy!)
 
Charis xo