Wednesday, 29 April 2015

Polly Pockets // Collections


As children my sister and I loved playing with Polly Pockets, and over the years we accumulated quite a collection! I forgot about them until recently when I discovered that my Mum still had them all in a box in her attic! Last time I visited my parents I had a great time looking through them all, and snapped a few photos of my favorite ones in the collection to share with you guys!


These two are the classic kind I picture when someone says 'Polly Pocket' - the white one is a Wedding one (although the bride and the vicar were nowhere to be found) and the yellow is a Baby one! If I remember correctly the Wedding one actually played the wedding march when you opened the doors! Amazing!


The above three Polly Pockets were part of a holiday series I believe. I love that the Island and the Beach Hotel fit perfectly side by side - I remember playing with these a lot! And you can't go on holiday without your camper van! It even has a little shower and everything!


This Ballerina one was one of my sister's favorites! I love how it folds out to create a beautiful theatre, and especially love the detail - the mirror and bar in the dance studio are great! And the ballerina's legs actually split so you can have her doing proper ballet moves!


This last one, although not an official Polly Pocket, was and still is one of my favorites of our collection. Not only does the outside look amazing, but I love the fun, bright colors inside, the teensy aliens and best of all Mini Mouse and Daisy Duck in proper little space suits! Just too cool, in my opinion.

This is only about half of the collection! I can't wait until my kids are old enough to play with these just like I did.

Do you have any Polly Pockets?
Which toys do you wish you'd kept from your childhood?

Sunday, 26 April 2015

Rhubarb-Lemon Fizz Macarons


You may have noticed that my blog is looking a lot prettier all of a sudden! The lovely Toni of Lemon Freckles recently gave my blog a bit of a makeover, and as a thank you I thought I would bake her some macarons! 

I wanted to make them extra special, and I think I've come up with a Macaron that is basically Toni in food-form! Not only are these macarons super cute (everybody loves pastel sprinkles, right?) they're packed full of delicious, tangy flavors. Rhubarb shells sandwiched together with a zesty Lemon Sherbet Frosting and a sprinkling of Popping Candy! 


Rhubarb-Lemon Fizz Macarons
Recipe by Charis Mitchell
Makes 20 macarons

For the shells
3/4C water drained from a can of chickpeas
1/2C sugar
10 drops rhubarb flavoring (make sure it is NOT oil based)
1/4tsp pink food coloring 
1 1/4C ground almonds
1/2C powdered sugar
2tsp pastel sprinkles

For the frosting
1Tbsp heaped vegan butter spread
3 1/2 - 4C powdered sugar
Juice and zest of 1 large lemon

4tsp popping candy (vegan lemon popping candy here)

Make the shells
Begin by simmering the chickpea liquid in a small pan over a medium heat until it has reduced to 1/3C. Set aside to cool for 10 minutes while you prepare your dry ingredients.

Process the ground almonds for a few seconds in a food processor until finely ground, then add the powdered sugar and process again until combined. Sieve into a medium bowl and discard any pieces too big to pass through the mesh. 

Once the chickpea liquid has cooled down pour it into the bowl of a stand mixer fitted with a balloon whisk and whisk on medium speed until white and fluffy (this takes me around 5 minutes) Add the sugar and whisk on high until the meringue is extremely stiff and glossy (depending on your mixer this can take anywhere from 5-10 minutes) Add the rhubarb flavoring and pink coloring and whisk until combined. 

IMPORTANT : At the end of this step the meringue should be really, really thick - almost the consistency of marshmallow fluff. If the meringue isn't thick enough your macarons won't turn out perfect.

Add half the dry ingredients to the meringue mixture and mix, using a spatula and pressing down to remove some of the air from the mixture. Add the rest of the almond-sugar mix and stir in a circular motion until there are no dry bits left. 

Press the batter against the side of the bowl and then scoop up from underneath. (Watch a video of this step HERE) Repeat this 15-20 times, until the batter is thick but slowly drops off the spatula, like a ribbon.

Spoon the mixture into a piping bag and seal it at the top. Pipe 1 inch circles onto baking trays lined with grease proof paper, being careful to pipe from above as opposed to from the side. Hold each tray at chest level and drop onto the work surface or table twice. Sprinkle the sprinkles over the top of half of the macarons and leave to dry out for two hours at room temperature.

Place your first tray of macarons in the oven and then set it to just under 100 degrees Celcius. Bake the macarons for 20 minutes before turning off the oven and leaving them in there for 15 minutes, and then opening the door and leaving them in there for a further 15 minutes. Remove the tray from the oven and leave the macarons to cool completely on the tray while you make the frosting.

Make the frosting
Cream together the butter spread and a cup of the powdered sugar until fluffy. Add the lemon juice and zest and mix well. Add more powdered sugar, a 1/2C at a time until your frosting is thick but will pipe easily. Scoop into a piping bag and seal at the top. Pipe generous blobs of frosting onto the bottom shell halves (the ones without the sprinkles) and top with a sprinkling of popping candy before sandwiching them together with the top halves.

Place in the fridge in an airtight container overnight - this is an important step as it allows the flavor from the frosting to seep into the shells and gives the macarons the desired chew.

Macarons keep well in the fridge for up to a week and in the freezer for months.


Pssst...Floral Frosting is now open to Sponsors! xo

Sweet Sunday Snapshots


This week has been full of sweet moments! I hope yours has too!

-New Desk Plants from Tiger. What do you mean they're erasers? Shhhhhhhh....
-Macaron Madness! I've made some of the best batches of macarons yet this week, and these Rhubarb-Lemon Fizz ones were sent to Toni of Lemon Freckles as a thanks for my blog makeover!
-My Growing Bump. I'm 28 weeks pregnant now and really feeling it! But I'm trying to embrace my big bump as much as possible as I know this will be my last pregnancy! (ps: I only just discovered you can make any top a maternity top by wearing it over a tank top and tying it in a knot! Amazing!)
-Packing Away Easter Decorations. I have a mini white 'Christmas tree' that I decorate seasonally all year long, and I finally packed away my Easter decorations this week - just need to put the finishing touches to my summer decorations now!

Sweet links
-I discovered Hey Jules this week and oh my goodness, she's the queen of cute!
-Kaylah shared some Blue Beach Finds over on The Dainty Squid
-Nicola talked about Turning 28 over on Inside The Cabinet of Wonder
-Currently dying over these Cactus Salt & Pepper Shakers from Target...some sweet US friend, send me some!? Pretty please??

What sweet moments have you had this week?

Friday, 24 April 2015

Play With Your Food / Hal's Play Kitchen


For Hal's 1st Birthday last a couple of weeks ago we decided to buy him a play kitchen. With a baker for a mum, he is always happily watching me bake and cook, and we thought he would really enjoy having his own little kitchen where he could cook too!

A lot of people think that play kitchens, tea sets and baking toys are just for girls but we are very much of the stance that there are no 'girls toys' or 'boys toys' - there are just toys!

It turns out we were right, Hal absolutely adores his play kitchen! Every day since we gave it to him he has spent the majority of his time playing with it! He especially loves 'making pasta' and he loves it when I pretend to eat the play food, making it disappear!


I'm completely in love with the beautiful fruits and vegetables family members bought for Hal's little kitchen. We asked that family and friends who wanted to contribute to the kitchen buy wooden toys, as we wanted to create a vintage-look play kitchen, and we just love the feel and look of wooden toys as opposed to plastic.


I have to confess that my absolute favorite toys for the kitchen are the beautiful little coffee machine and - the star of the show - the mini kitchen aid mixer! I can't quite get over the cuteness of the mixer, and I love that the top actually lifts up and the whisk attachment turns - just like my one!

I really think we couldn't have chosen a better Birthday gift, and I know Hal (and his soon-to-arrive little brother) will enjoy playing with this little kitchen for years to come!

What toys did you love as a child?


Details
Play Kitchen - Infantastic - Amazon
Coffee Machine - Lelin - Amazon
Kitchen Mixer - Le Toy Van - Amazon
Cutting Board & Fruit and Veg - Viga - Amazon
Wooden Fruit - John Lewis
Shopping Basket - Tiger UK 
Burger & Sandwich Set - Melissa & Doug - Amazon
Pots & Pans - John Lewis
Tea & Cake Set - The Early Learning Centre
Pasta Set - Hape - Amazon
Biscuit Set - Amazon

Single Serving Cupcakes Two Ways

 I recently watched a brilliant interview with Sayward Rebhal (of Bonzai Aphrodite) about raising a vegan child. One of the things she was asked was what she does when her son goes to other kids birthday parties, to which she replied that she finds out what kind of cake they are having and makes cupcakes of the same kind so that he can take one with him, and not feel left out when it comes time for the cake. I thought that was such a great idea and one I will be using with my kids! She also mentioned wanting to create a single-serving cupcake recipe for occasions such as these, and it inspired me to create this recipe.

Now I have a confession to make...this recipe makes two cupcakes, not one...but there's no way I'm going to make a cupcake for Hal to take with him to a birthday party and not get to eat one myself!

This recipe makes a pair of deliciously light and spongy vanilla or chocolate cupcakes, perfect for those times when you're craving a cupcake but you don't want to have to frost (and eat) 12! 


Single Serving Cupcakes Two Ways
Recipe by Charis Mitchell
Makes 2 large cupcakes

For the cupcakes
1/3C self-raising flour
1/4C sugar
1/4tsp baking soda
1/4tsp vinegar
1/2tsp vanilla extract
1Tbsp oil
1/4C almond or soy milk

2tsp heaped cocoa powder

For the frosting
1tsp heaped vegan butter spread
1 1/4C powdered sugar, divided
1-2tsp almond or soy milk

1/4tsp pink food coloring
1/4tsp vanilla extract

2tsp cocoa powder

Sprinkles to finish

Make the cupcakes
Preheat the oven to 175 and place two large cupcake or muffin liners in a muffin pan.

In a small mixing bowl mix together the flour, sugar and baking soda. Add the vanilla, oil, vinegar and milk and whisk until smooth. (If making chocolate cupcakes add the cocoa powder at this point and mix well.) Pour the batter into the liners and bang the pan on the work surface twice to remove excess air bubbles. Bake for 12-15 minutes or until a knife inserted into the middle of the cupcake comes out clean. Place on a wire rack to cool completely while you make the frosting.

Cream together the butter spread, one cup of powdered sugar and 1tsp of milk until smooth and thick. Add more powdered sugar or milk as needed until you have a thick but fluffy frosting. If you are making chocolate frosting, add the cocoa powder and mix until smooth. If making vanilla, add the vanilla extract and food coloring and mix well.

Once the cupcakes have cooled completely cover them with a generous amount of fluffy frosting and finish with some sprinkles! Enjoy!


Just as I was taking the above photo Hal (cheeky cupcake thief) stuck his hand in the frosting!

Which do you prefer, Chocolate or Vanilla?

Wednesday, 22 April 2015

Photo an Hour / 15-04-15

I love seeing 'Photo an Hour' posts on people's blogs as it gives you a great insight into the daily life of the blogger! I thought I would try to make it a monthly feature here! 

7am // Up watching cartoons with Hal while sipping on some yummy Apple Cinnamon Tea 
8am // Hal is napping so I've got blogging to do! I love my little desk with all it's cute clutter!
9am // Finally ready for breakfast, and it's such a gloriously sunny day so I munched on watermelon - so refreshing!
10am // Whipping up some tasty treats in the kitchen while Hal plays with his play kitchen.
11am // A quick trip to the doctors as Hal has been poorly for a while now, turns out he has an ear infection.
12pm // Hal's asleep and it's time for lunch! A cheeky VBites Chick'n Nugget sandwich.
1pm // My lovely friend Olivia came by for a cuppa and Hal had a great time playing with her
2pm // Sweet treat! Macaron Ice Cream with Frozen Cherries & Lychee Popping Boba.
3pm // Rearranging the toys in our display cabinet.
4pm // Pete brought me a little treat, some non-alcoholic Pear Cider! Yum!
5pm // Hanging up washing and tidying our bedroom, in my PJ bottoms!
6pm // Bath time for the little man before he goes to bed.
7pm // Ready to make dinner! Tonight we are having baked spaghetti - yum!

I've had so much fun taking hourly snaps, if you want to see more photos from my daily life why not follow me on Instagram!

What does a typical day look like for you?

Monday, 20 April 2015

Coconut Cake with Passion Fruit Curd


It's starting to feel like summer here in England and I couldn't be happier about it! I was inspired by the summery weather to make this gorgeously tropical Coconut Cake with Passion Fruit Curd.

The coconut sponge is so moist and delicious, slathered with a generous covering of coconut frosting and topped with desiccated coconut (could this cake be any more coconut-ty!?) Absolutely perfect when served with an ample splodge of my passion fruit curd. 
This cake will make you feel like you're holidaying on a tropical island - promise!


Coconut Cake with Passion Fruit Curd
Recipe by Charis Mitchell
Serves 8-10

For the cake
1 1/2C flour
1C sugar
1/3C desiccated coconut
1tsp baking soda
1 1/3C water
1/3C oil 
1Tbsp vinegar

For the frosting
1Tbsp (heaped) vegan margarine 
2-2 1/2C powdered sugar
1/4C desiccated coconut
2-4Tbsp almond or soy milk

For the curd
3 ripe passion fruits
1/2C sugar
1/4C almond or soy milk
4Tbsp (heaped) cornstarch
6tsp water
2tsp (heaped) vegan butter spread

1/4C desiccated coconut to finish

Make the cake
Preheat the oven to 175/350 and grease a your loaf pan and set aside.
In a medium mixing bowl whisk the wet ingredients into the dry ingredients until the mixture is nice and smooth. Pour into the prepared pan and bake for 45mins or until a knife inserted into the center of the cake comes out clean. Carefully turn out of the pan and leave to cool completely on a wire rack while you prepare the curd and frosting.

Make the curd
Scrape the seeds, juice and fruit from the passion fruits into a small saucepan. Add the sugar and place over a medium heat. Stir continuously until the sugar has dissolved. Add the milk and mix well. Spoon the cornstarch into a mug or small bowl and add the water. Stir until the mixture becomes liquid and pour into the pan. Stir continuously until the mixture thickens (the cornstarch will be completely cooked when the mixture turns from a creamy light yellow to a darker, more transparent yellow. Remove from the heat and stir through the buttery spread until melted.
Pour the passion fruit curd into a jar and once cool, place in the fridge until you want to use it.

Make the frosting
Cream together the margarine, desiccated coconut and half the powdered sugar until smooth. Add the rest of the sugar and mix until fluffy, adding milk as needed.

Spread the frosting evenly over the cake and sprinkle with the desiccated coconut. To serve, cut thick slices and spoon a good dollop of passion fruit curd on top.

Store the cake in an airtight container and the curd in the fridge for up to one week.

Saturday, 18 April 2015

Sweet Sunday Snapshots


This week has been really difficult as poor Hal has been suffering with a bad ear infection. Anyone who has littles knows that when baby is sick it effects everything! He's on the mend now, and I've still had many happy moments throughout the week!

-Super cute clothes & yummy drinks. With my baby belly ever expanding I found myself in need of some new comfy clothes, so we popped to Primark and I grabbed a few pairs of cute PJ bottoms to wear around the house - including these adorable ones, don't they remind you of Lemon Freckles!?
-Hal's Birthday! My baby turned one on Tuesday, and even though he wasn't feeling very well we managed to have a nice meal out at Wagamama with some lovely friends and enjoyed ourselves as much as we could.
-Pretty nails. I'm obsessed with nail polish and I've loved this week's nails design!
-Comfort food! There's little better after a really tough day than a big, comforting bowl of Mac 'n' Cheese with ketchup on top!

Sweet links
-Toni shared her Big List over on Lemon Freckles
-Katie talked about Cooking With the Little Gals on Skunkboy Blog
-Nicola blogged about A Sunny Day in Herne Bay on Inside The Cabinet of Wonder
-This video pretty much sums up my husband's reaction to the new Star Wars teaser!
-Eco-Vegan Gal interviewed Sayward Rebhal of Bonzai Aphrodite on Raising Vegan Kids


What sweet moments have you had this week?

Wednesday, 15 April 2015

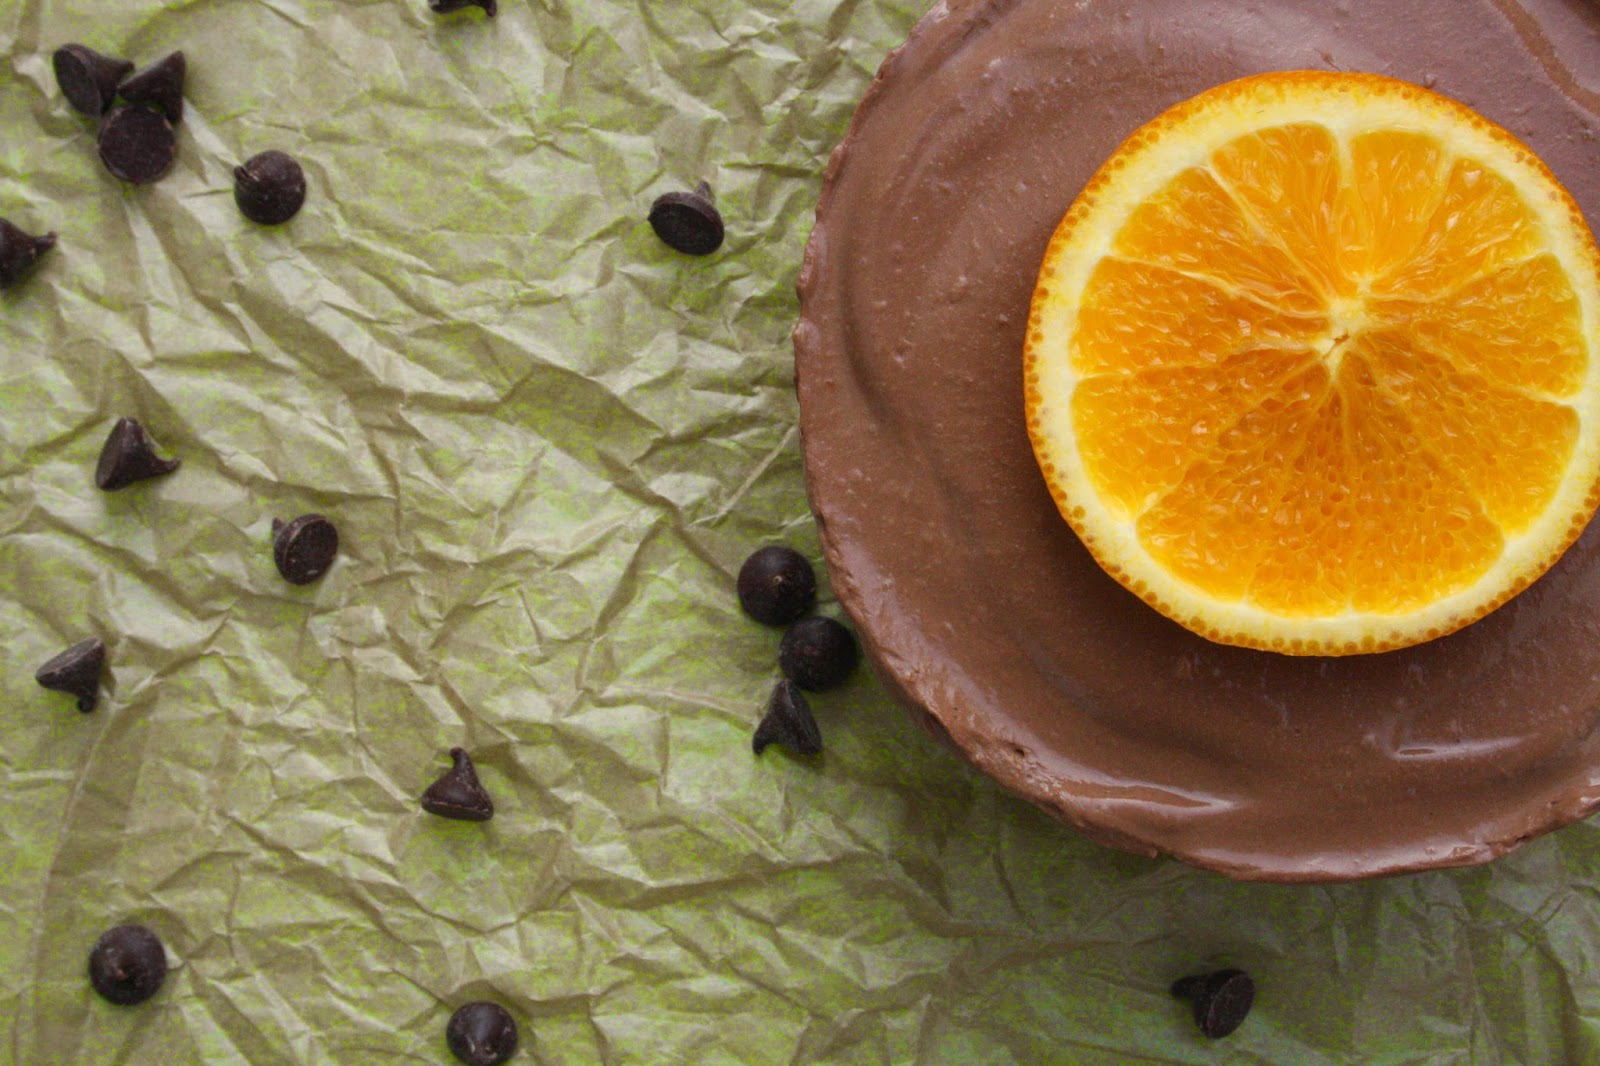
Chocolate Orange Cheesecake for Two


This is the perfect decadent dessert for a date night. A seductively smooth, dark chocolate mousse, dotted with zingy orange zest sits atop a chocolatey biscuit base. Although this cheesecake may look small, it is incredibly rich and the perfect size for two. 


Chocolate Orange Cheesecake for Two
Recipe by Charis Mitchell
Serves 2

For the base
6 bourbon biscuits
1tsp vegan butter spread, heaped
2tsp almond milk

For the filling
3/4C silken tofu
2Tbsp liquid sweetener (I used maple)
Zest & juice of 1 small orange
1/4C almond milk
1/2C dark chocolate chips

Make the base by processing the biscuits until no lumps remain. Add the butter spread and milk and process until the mixture comes together into a lump of dough.
Press the dough into a small spring form tin and smooth the base as much as possible. Place in the fridge while you make the mousse.

Put the tofu, sweetener, orange zest and juice and almond milk into a blender and blend until as smooth as possible. Melt the chocolate chips in the microwave (this took me about 1 minute 30 seconds) and add to the blender. Blend until the mixture is thick and smooth. Pour on top of the base and smooth down the top before returning to the fridge for 2 hours or until set firm. Once the cheesecake is set carefully remove from the spring form tin and top with an orange slice before serving.

All that's left to do now is grab a couple of forks and dig in!